Contents:
1. Overview
2. Step 1: Setting up an Authenticity Check API Token in Prolific
3. Step 2: Setting up your study on Prolific to include URL parameters
4. Step 3: Setting up Gorilla to run the authenticity checks
5. What you should see when you start collecting data
6. Need more help?
Helpful resources:
1. What is an authenticity check?
2. How to create an API token for authenticity checks
Overview
Our tool is designed to work with Questionnaire experiments in Gorilla, but not Task Builder experiments.
Get started in 3 steps:
- Create a token in Prolific to get access to our API
- Set up the study on Prolific to include URL parameters
- Add a custom script to your survey that tracks user interactions and sends data through to our authenticity check tool
Detailed instructions for each step are provided below.
Step 1: Setting up an Authenticity Check API Token in Prolific
Before you can start implementing authenticity checks into your survey, you'll need to create a new API token on Prolific. We recommend creating one specifically for this use case.
✋ Important: Please do not share your API token with anyone, including Prolific Support
- Go to the workspace in which you intend to run your research or AI tasks
- Click API Tokens on the left to manage or generate tokens
- Click on ‘Create Authenticity Check token’
- Enter the name of your new API token to easily identify its purpose later
- Click ‘Create token for Authenticity Check’
- Finally, you'll be taken back to the API tokens homepage where you can copy the token.
You’ll be able to use this token with any integrations which support authenticity checks (currently Qualtrics & Gorilla only)
Step 2: Setting up your study on Prolific to include URL parameters
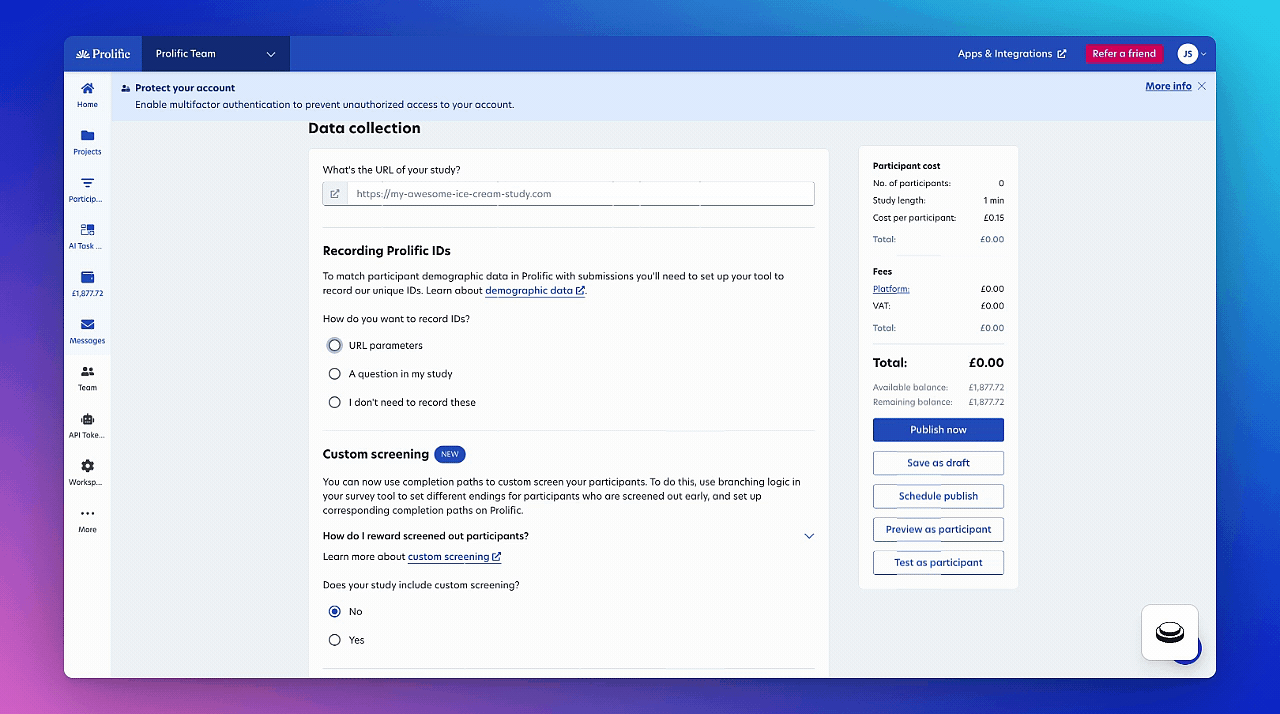
1. When creating your Prolific study, you must use URL parameters to record participants IDs, rather than asking them to give it to you as a question in the study. In the Recording Prolific IDs section, select the URL parameters option.
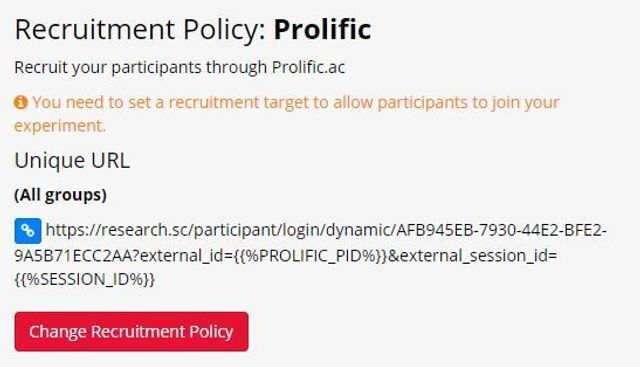
2. Next, open your experiment on Gorilla and go to the 'Recruitment' tab
3. Click "Change Recruitment Policy" > "Recruitment Service" > choose "Prolific" > click "OK".
4. Read the information provided, then click 'Use This Policy' and Gorilla will provide you with your unique study URL that has been pre-filled with the required parameters. Make sure SESSION_ID is one of the options. This allows us to link the authenticity check to the submission in your study.
5. Use this unique URL as your Study URL on Prolific. Go back to Prolific, and paste this link in the 'What is the URL of your study?' box.
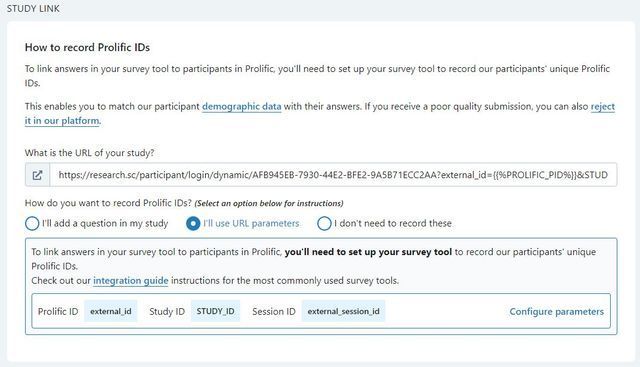
6. Configure the Prolific ID parameter to be named 'external_id' (as below), in order for the recording of IDs to work correctly:
Step 3: Setting up Gorilla to run the authenticity checks
👍 Prolific's authenticity check feature currently supports free-text questions using the Comment Box component in Gorilla's Questionnaire Builder.
❌ Prolific's authenticity check feature does not support questions built in Gorilla's Task Builder.
- Create your Questionnaire in the usual way
- When creating a free-text question you need to:
- Select the
CommentBoxcomponent - Make sure there is always a “next” button on each question where you want to run the authenticity check
- NOTE: This is version 1.0. In future versions, we'll improve functionality to support more component types and allow multiple questions per page
- Select the
- Once you’ve created your Questionnaire, you can then add a script to your study
- Go to the Scripting tab > select “New Script” in the top right corner > Select “Blank slate”.
- Name the script anything you want
- Copy and paste the code from here
In the first line of code, replace enterTokenValue with your Prolific authenticity check API token. This step allows us to link the authenticity check data to your account.
Your questionnaire should be ready to launch on Prolific and run authenticity checks!
What you should see when you start collecting data
As your study goes live, you should see a new column called “Authenticity Check” appear on the submissions page.
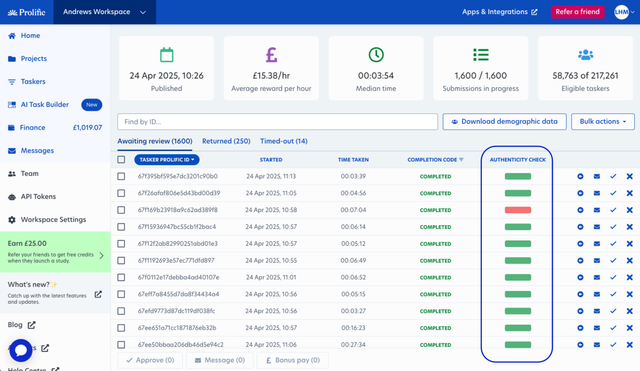
As submissions come in, results appear in the authenticity check column with the following indicators:
- Green bar: Indicates all free-text responses appear authentic
- Red bar: Indicates suspicious patterns were detected in all free-text responses
- Mixed bar: Shows some questions were flagged (e.g., 50% green, 50% red if 2 out of 4 questions raise suspicion)
Need more help?
If you need more guidance on how to create a script in Gorilla, see Gorilla’s guidance here.
Please watch the below video to see the steps in action, too.
Our Support team will also be on hand to help.