Contents:
1. Overview
2. Step 1: Setting up your study on Prolific to record Prolific IDs via URL parameters
3. Step 2 - Setting up Qualtrics to run the authenticity checks
4. Step 3 - What you should see when you start collecting data
Helpful resources:
1. What is an authenticity check?
2. How to create an API token for authenticity checks
Overview
Our authenticity check is specifically designed to work on Qualtrics questionnaires containing free-text questions.
To get started:
- Set up the study on Prolific to include URL parameters
- Generate a script and API token
- Add a Qualtrics-specific custom script to Header. This will track user interactions and send data through to our authenticity check model.
Detailed instructions for each step are provided below.
✋ Note: Before you proceed, JavaScript use in Qualtrics survey headers and questions is not available on the free account plan
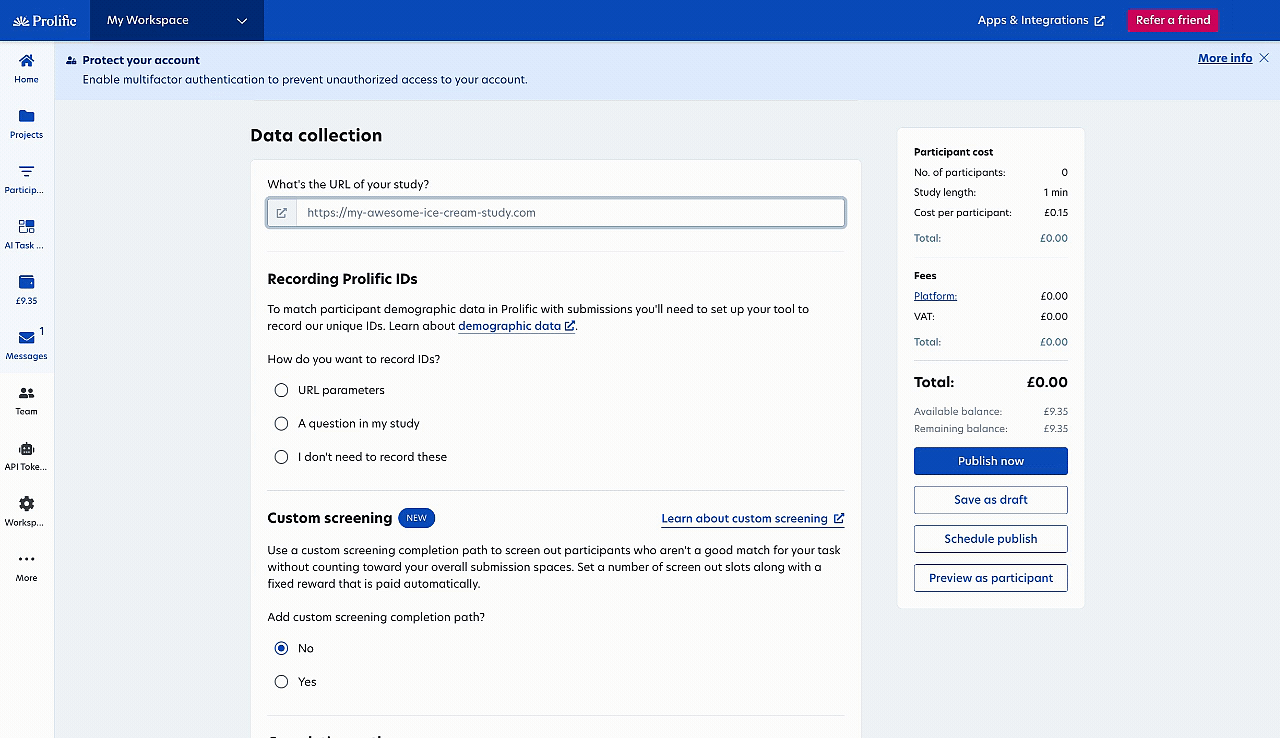
Step 1: Setting up your study on Prolific to record Prolific IDs via URL parameters
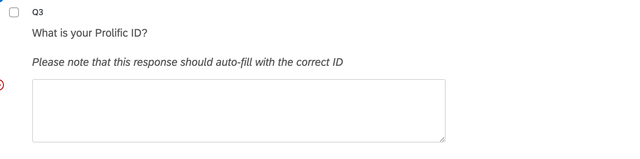
1. Go to Qualtrics, add a block to your survey named ‘Prolific ID’, and create a 'Text entry' question. In the question text, include the following message:
2. Go to 'Survey Flow' and add an 'Embedded Data' element at the beginning of your study. Into the embedded data field, type 'PROLIFIC_PID' and make sure it says 'Value will be set from panel or URL'. Do the same for ‘STUDY_ID’ and ‘SESSION_ID’. For authenticity checks, it’s important that SESSION_ID is included. It allows us to link the authenticity check to the submission in your study.

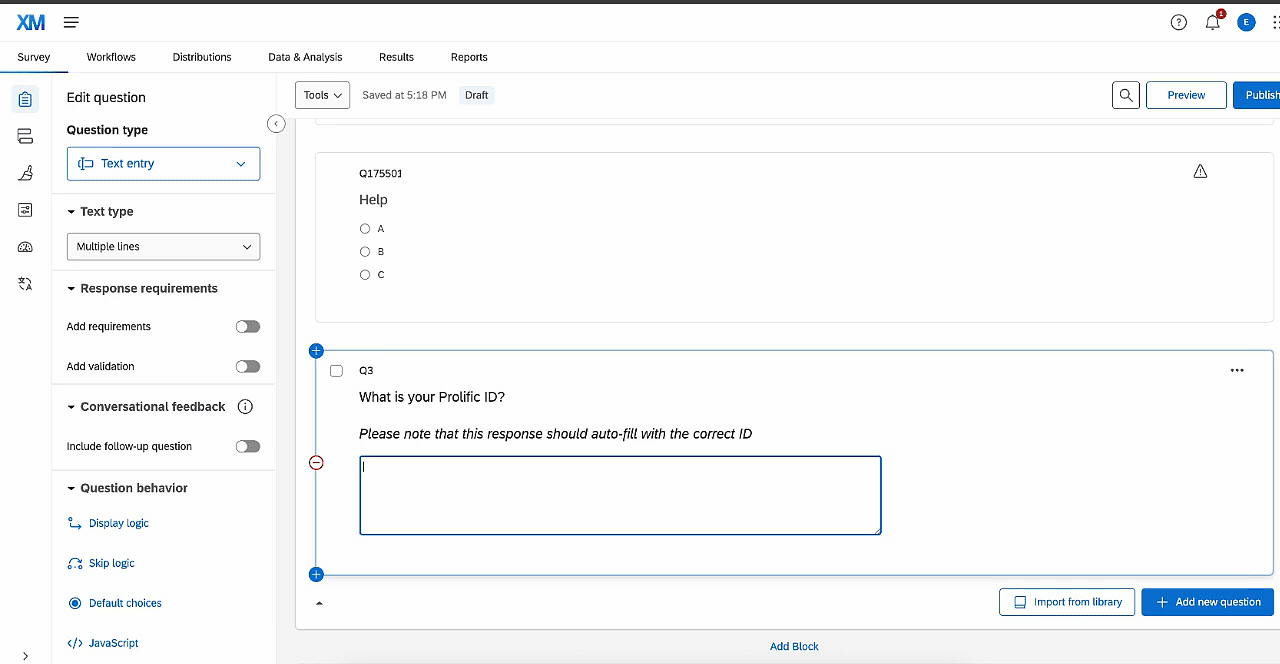
3. Now go to the survey question that records the participant's Prolific ID. Right-click on the text-entry field and select 'Default Choices'.
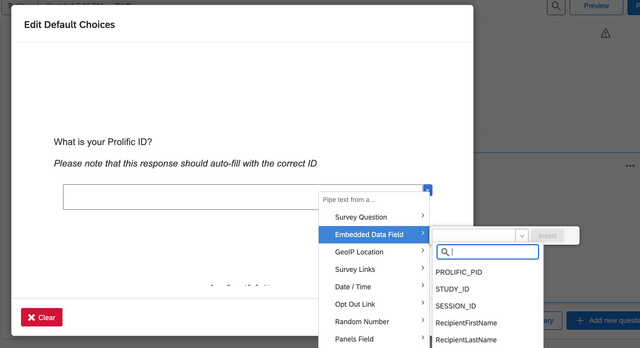
4. When the window opens, click the blue drop-down arrow on the right. Then select 'Embedded data field'. Here, either enter 'PROLIFIC_PID', or click the drop-down arrow to the right of the text entry box and select 'PROLIFIC_PID', then click 'Insert'.
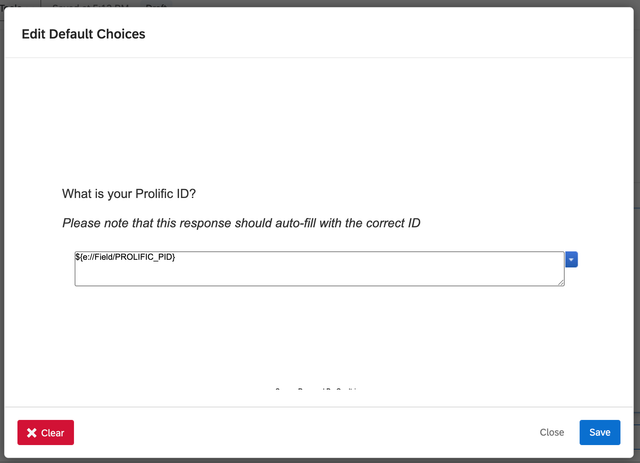
5. You should see a string called '${e://Field/PROLIFIC_PID}' populate the field. Now click 'Save', and you're done!
6. Finally, to record the Prolific ID, use the URL parameters option in Prolific. In the Recording Prolific IDs section on Prolific, enter your Qualtrics study URL in the 'What is the URL of your study?' box first, then select 'URL parameters' - this will automatically add the necessary GET parameters to your URL.
Your 'Study Link' box should now look something like this:
Step 2 - Setting up Qualtrics to run the authenticity checks
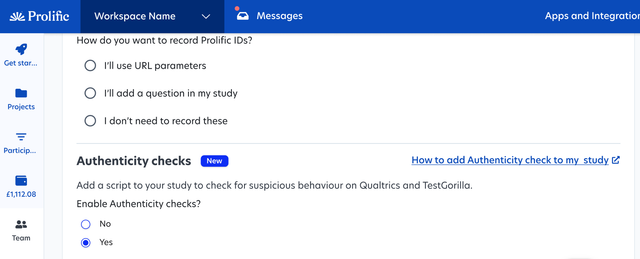
1. In the Authenticity checks section on Prolific, click "Yes" to enable Authenticity checks
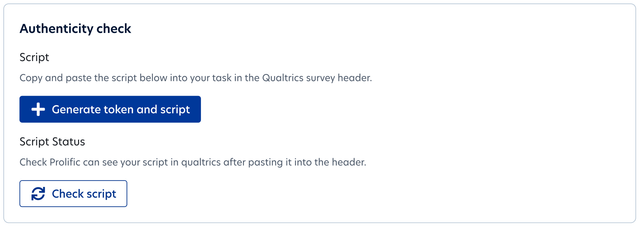
2. Click "Generate token and script"
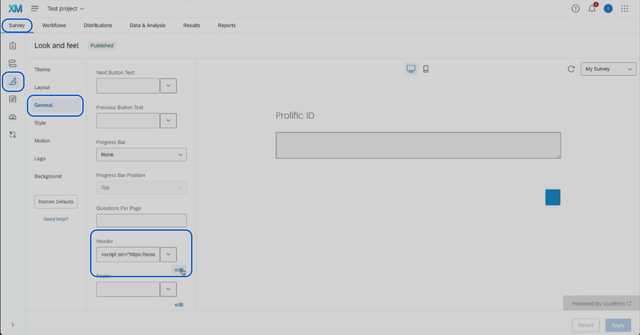
3. Copy and paste the generated script into the Qualtrics Header. To find this:
- On Qualtrics, click "Survey" on the top toolbar
- Click "Look and Feel" from the left side options
- Click the "General" option
- Scroll down to "Header" and paste your script using one of these methods:
Option 1: Simply click in the input field and paste the code script
Option 2: Click the "Edit" button to open a modal window, activate "Code Mode", then paste the script in the text area
- Click save
4. Press the “Publish” button in Qualtrics
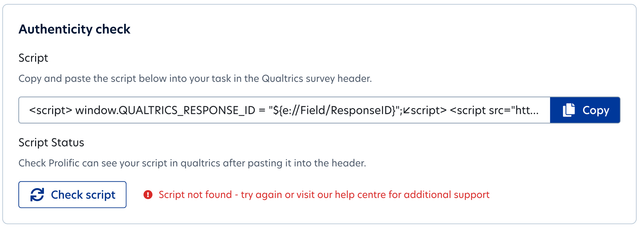
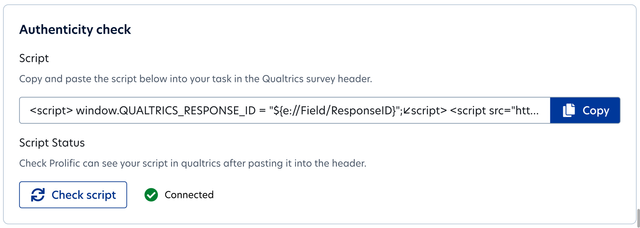
5. Go back to Prolific and click "Check script"
- If the script is successfully detected, you will see a green "Connected" tick next to the Check button
- If the script is not checked or not found, you will see a red error message next to the Check button. If you receive the "Script not found" error, double-check that you've correctly added the script to the Header of your Qualtrics survey and try again.
- The script must show as "Connected" for you to publish the study
Step 3 - What you should see when you start collecting data
As your study goes live, you should see a new column called “Authenticity” appear on the submissions page.
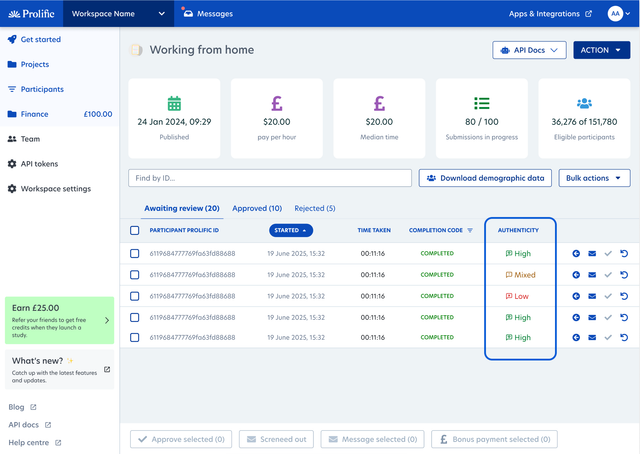
As submissions come in, results appear in the authenticity check column with the following indicators:
- High: Indicates “high authenticity”. All free-text responses appear authentic
- Low: Indicates “low authenticity”. Suspicious patterns were detected in all free-text responses
- Mixed: Indicates “mixed authenticity”. Some questions were flagged (e.g., 50% green, 50% red if 2 out of 4 questions raise suspicion)
Need further help?
Click here to contact us