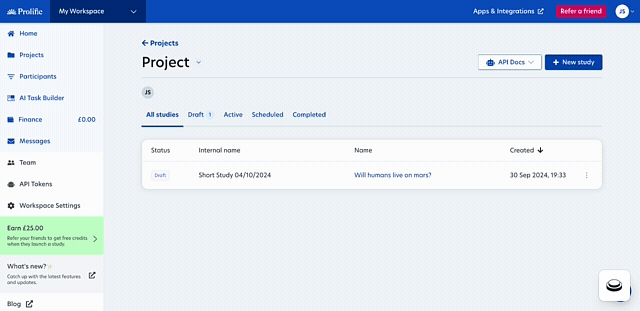
This article will explain how to recruit the exact participants you need for your study using criteria not available through our built-in prescreening options.
Contents
- What is custom screening?
- Using the built-in custom screening feature
- Using the two-study screening approach
What is custom screening?
The information in this section is relevant to both custom screening methods.
When to use custom screening
Custom screening lets you check for participant characteristics that aren't available in our built-in prescreening options.
While our free built-in prescreeners cover common demographic criteria (like age or political affiliation), you might need participants with very specific criteria that we don't screen for. For instance, if you need participants who take omega-3 supplements, you'd use custom screening to identify this unique demographic.
It’s important to note that custom screening can’t be used alongside our representative samples.
If you’re interested in validating any completed prescreening, you can learn more here.
Recommended formatting
When it comes to recruiting a custom sample, we recommend keeping your screening questions vague so that participants are not influenced to answer a certain way. We recommend setting up your study to only allow one response per participant to ensure your participant pool is accurate. Make sure to configure your external software to do the same.
One method is to ask a variety of questions so that the participants don't know which one you're actually measuring. You could, for example, ask the following questions with 'yes/no' answer options:
- "I do open water swimming at least twice a month"
- "I own an Air BnB"
- "I use an electric toothbrush"
- "I use an Uber at least twice a week"
- "I own a poodle"
- "I have 3 children"
Your custom screening questions should be set as mandatory/required responses (if your external survey software offers this feature) and should appear at the very beginning of the study. This ensures participants who don't meet your criteria are screened out immediately.
Finally, we also encourage keeping the title of your study ambiguous to prevent participants from being influenced in their answers.
Should I use the custom screening feature or the two-study approach?
Which method you should use, depends on how you collect your data.
- If you collect your data using the 'External study link' option and your external study software allows for branching, we recommend you use the built-in custom screening feature.
- If you collect your data using any of the other options (AI Task Builder, Taskflow, Survey Builder) or your external study software doesn’t allow for branching, we recommend you use the two-study approach.
Using the built-in custom screening feature
We recommend using this feature if you collect your data using an external study link and your external study software supports branching logic.
Setting up your survey using the custom screening feature
1. Create your screening survey
First, head over to your preferred external survey software and create something new. If you need some help, our integration guides have specific instructions for the most common survey software.
Next, add your prescreening questions at the beginning of your study (scroll up to see our recommended formatting) - remember to keep them vague so that participants aren’t influenced to answer a certain way.
Next, you'll want to set up your survey to take different paths:
- If someone answers "Yes" they'll continue to your main survey
- If it's a "No" they'll be directed to your end of survey message
Again, check out our integration guides for how to set up these paths, including how to create your end of survey message in your software.
2. Move over to Prolific
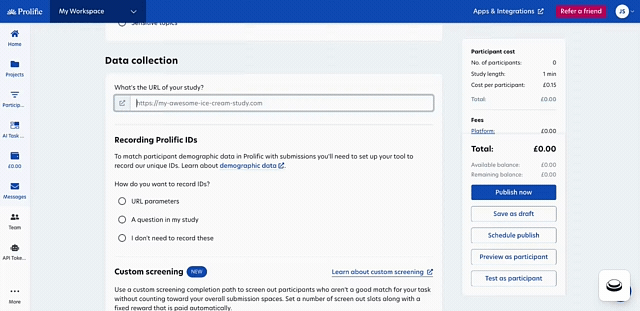
- Under Data Collection type, select ‘External Study Link’
- Once you’ve filled in all the relevant study details head to the ‘Data collection’ section.
- Enter your survey link, then scroll down to ‘Custom screening’ and enable it by clicking ‘Yes’. Custom screening won't be available until you've completed these two steps.
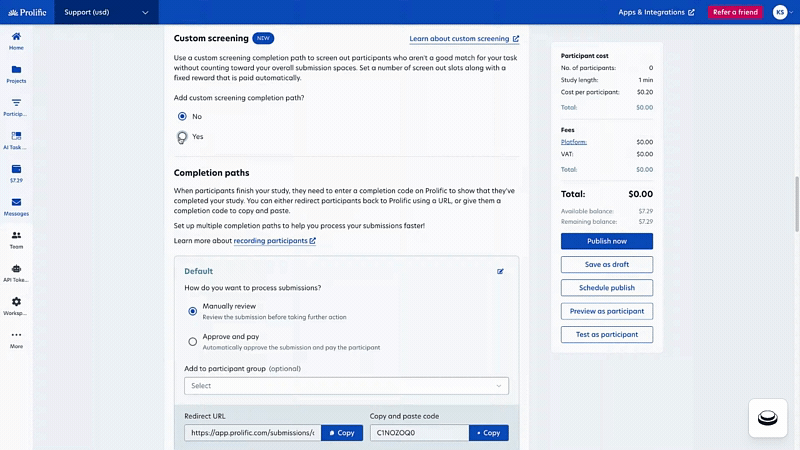
3. Setting up custom screening
When setting up your study on Prolific, you'll need to configure how participants who don't qualify will be handled:
Input the number of screen-out slots:
You'll need to specify the maximum number of participants that can be screened out. This is separate from your study's total number of places. Once the maximum screen-out slots are filled, your study automatically pauses.
Input the screen-out reward amount:
Set a fixed payment for screened-out participants (minimum £0.10/$0.14). This reward cannot be changed after publishing your study.
Automatic handling:
Once a participant is screened out, they will follow the redirection URL you've set at the end of this path and enter the screened-out completion code. This way, they will automatically be approved and paid. This way, you no longer have to manually select each participant and mark them as screened out.
Cost transparency:
The study setup page shows a detailed cost breakdown, allowing you to see the cost of your screen-out slots and rewards, all of which are included in your total study budget.
Cost/rewards
With the built-in feature, we've simplified how participants are rewarded. It’s important to note that all participants must be paid, including those who are screened out.
Fixed rewards instead of an hourly rate
When using custom screening, you'll need to set a fixed reward for screened-out participants. For screening questionnaires that take one minute or less, the minimum reward is £0.10 or $0.14, and cannot exceed the full study reward for participants who complete the entire study.
It's important to note that once your study has been published, this screen-out reward cannot be adjusted.
See total screening costs upfront
We've streamlined the accounting process for screen-out rewards. While these payments are still processed as bonuses, they're now included in your upfront study costs instead of affecting your wallet's remaining balance separately. This means you'll see these potential expenses clearly reflected in the estimated costs for these studies.
Automatic payment and refund process
Screened-out participants will be automatically paid the fixed amount for completing the screening. If your study completes without using all the screen-out slots you budgeted for (because all study places were successfully filled with qualifying participants), any unused amount that was initially charged to cover potentially screened-out participants will be automatically returned to your account when the study is completed.
Limit the number of screen-out slots to stay within budget.
You can specify the maximum number of participants who can be screened out of your study. Once this limit is reached, your study will automatically pause to prevent unexpected costs. You'll receive an email notification when this happens, allowing you to either increase your screen-out slots with additional budget or leave the study paused.
Managing screened-out submissions
In the new version of custom screening, the process of managing screened-out participants has been streamlined to save you time and provide greater transparency.
Automated screening process
The system now handles most screening automatically. You'll no longer be prompted to manually enter payment amounts for screened-out participants, as the fixed reward you set during study creation is automatically applied. This reward remains constant regardless of how long participants spend on the screening questions.
✋ When participants are screened out, you must set up a redirection URL with the appropriate completion code at the end of your prescreening section.
Screen out slots vs. study places
Screen-out slots = the number of participants you’re happy to screen out and pay.
Study places = the total number of participants you need to pass custom screening and take the study.
Screened-out submissions now use dedicated "slots" on top of study places. This means you don't need to worry about reopening places when participants are screened out. If all your screen-out slots become filled, your study will automatically pause to prevent unexpected costs. You can then choose to increase the number of slots if needed.
Enhanced visibility
The updated study page provides clear visibility into your screening process. You can easily monitor your slot usage and view detailed information about automatically screened-out submissions in the dedicated "Screened-out" tab. This makes it simple to track how many participants have been screened out and why.
Adding more slots
If you need additional screening capacity, a new action allows you to increase your study's slots. When selected, a pop-up window will display the updated cost calculation for your study with the additional slots. Just like when increasing study places, you'll need sufficient funds in your wallet to cover these potential costs.
Two-study screening approach
If you’re unable to obtain the specific population you require using our existing prescreening filters, you can run two separate studies on Prolific to recruit your sample.
When budgeting for the two-study approach, it's important to consider that you'll need to account for both the screening study payments (minimum £0.10/$0.14 per participant) and the full reward for those who qualify for and complete the main study. To help with planning: let’s say you're aiming to find 100 eligible participants, you may need to screen a larger pool of participants first to reach your target sample size.
Setting up your studies using the two-study approach
1. Create Initial Screening Study
- We recommend using our Survey builder if you’re eligible and the questions aren’t of sensitive nature. Otherwise, checkout out our integration guides for an alternative external survey software.
- First, add your screening question following the recommended formatting above (e.g., "I have taken omega-3 supplements")
- Then, include basic response options (e.g., Yes/No)
- Next, you’ll set your sample size (e.g., 100 participants)
2. Collect and Review Responses
- Publish your screening study
- Once the correct number of participants have completed the survey, review the responses to identify eligible participants
- If you used external survey software, your data will be stored there
- If you used Prolific's Survey Builder, your data will be stored on Prolific
- Obtain the IDs of the eligible participants to use in either a custom allow list (one off uses) or save them as a participant group (better if you may need to use the group again)
- Once the correct number of participants have completed the survey, review the responses to identify eligible participants
3. Set Up Main Study
- Create a new study that contains your main research content, including all your survey questions, tasks, or other research materials. This will be the full version of your study that qualified participants will complete after passing the screening criteria
- To select your participants, you can either:
- Using the custom allow list
- Go the the ‘Prescreen participants’ section
- Click on ‘Add screeners’
- Select ‘All screeners’
- Scroll down to ‘Custom screener’
- Select ‘Customer allowlist’
- Paste the IDs of the eligible participants
- Using a saved participant group
- Go to ‘Source’ section
- Click on ‘Use saved groups of participants’
- Use the drop down menu to select your saved group
- Using the custom allow list
There's no need to apply a blocklist when publishing your main study since it will only be visible to participants you've specifically included through either the 'Custom Allowlist' or your selected participant group.
Cost/rewards
When budgeting for the two-study approach, consider both costs: the initial screening study payments (minimum £0.10/$0.14 per participant) and the full reward for participants who qualify for and complete the main study.
💡 Example You're aiming to find 100 eligible participants who have taken omega-3 supplements. Your prescreening study may need to recruit 200 people to find 100 eligible participants. In this scenario, you'd pay a screen-out reward to the 100 ineligible participants and the full reward to those who qualified.
Note: Since we don't store the specific participant data you're looking for, we cannot estimate or advise how many participants you'll need to prescreen to reach your desired number of eligible participants.
Need further help
Click here to contact us